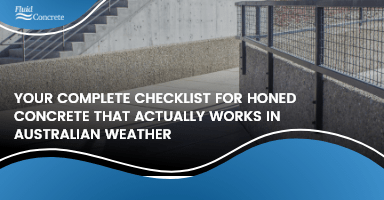
When Should You Install Liquid Limestone in Perth?

Should You Choose Concrete or Pavers for Your Australian Outdoor Space?
March 13, 2026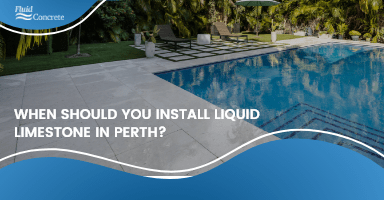
Installing Liquid Limestone in Perth: Why Timing Matters
Liquid limestone is a poured blend of crushed limestone and cement that creates a uniform, durable surface which stays cool underfoot. This makes it perfect for Perth’s outdoor spaces like pool surrounds, patios, pathways, and driveways.
Because it’s poured as one continuous slab, there are no joints to worry about. You get a seamless finish that handles high-traffic areas and hot weather without breaking a sweat.
Getting the timing right during installation is crucial for Perth’s climate. The right weather window helps the surface cure properly and ensures the sealant goes on at the perfect time, typically one week after pouring.
Scheduling installation during dry, mild conditions prevents rapid drying or moisture problems that can mess with the curing process. Avoiding heavy rain or scorching heat means you won’t get surface cracking, staining, or patchy curing.
Install at the optimal time and you’ll maximise the benefits of a strong, low-maintenance surface. You’ll also reduce the chances of moisture-related headaches, so your outdoor area can be enjoyed exactly as intended for years to come.
Key Seasonal Factors That Influence the ‘Best Time’
Perth’s unpredictable weather makes dry conditions absolutely critical for liquid limestone installation. You need several consecutive days without rain for pouring, curing, and sealing to work properly.
The surface has to cure evenly, and the sealant needs time to form that watertight barrier you’re after. Get caught in a downpour during or just after installation, and you’ll end up with patchy curing and ongoing dampness issues.
Unsealed surfaces are sitting ducks in Perth’s climate. Moisture creeps in and creates perfect breeding grounds for mould and algae, particularly in those shady, damp spots where water hangs around like an unwanted guest.
Shaded areas with poor drainage spell trouble during wet weather installation. These locations hold moisture longer, increasing your chances of problems down the track.
Smart timing means picking a dry spell and checking your site’s shade patterns and drainage beforehand. Get this right and you’ll prevent moisture from sneaking in and damaging your investment’s appearance and longevity.
Curing, Sealing and Weather Windows
After pouring liquid limestone, keep all traffic off the surface for at least 24 hours. This initial waiting period lets the material set properly, preventing surface marks or early damage.
The first sealing step happens about one week after pouring, so schedule installation during a weather window that avoids persistent rain for this entire duration. Dry conditions ensure even curing and proper sealant bonding.
Rain or excessive moisture during this time creates inconsistent curing and can compromise the finish. You’ll end up with patchy results that affect both appearance and performance.
Choosing the right sealant matters for long-term surface performance. Both water-based and solvent-based options are available, but wet or high-traffic areas need a non-slip finish to maintain safety.
Proper sealing keeps the limestone non-porous, protecting against water infiltration and surface staining. This step preserves durability and makes routine cleaning straightforward.
Without sealing, you’ll face mould, algae, and unsightly marks in Perth’s climate. Get the timing right and you’ll enjoy a surface that looks great and performs well for years.
How Perth Conditions Shape the Ideal Timing
Heat and Sun
Liquid limestone handles Perth’s scorching summers brilliantly. While other surfaces become unbearably hot, this material stays surprisingly cool underfoot, even when the mercury hits its peak.
The limestone naturally resists heat absorption. You can walk barefoot across your pool surround or patio without that painful dance we’ve all done on blazing concrete or pavers.
Once installed and cured, high temperatures won’t affect performance. There’s no seasonal downtime or restrictions based on heat alone, so your outdoor space remains usable year-round.
Colour choice does make a difference though. Darker tints will absorb more heat than lighter, natural finishes. If you’re planning a high-traffic barefoot area, stick with lighter shades for maximum comfort during those 40-degree Perth days.
This colour consideration affects your comfort level, not the installation timing. The material itself performs consistently regardless of temperature once it’s properly set.
Rain, Damp and ‘Wetter Months’
Rain and moisture create genuine problems during installation and afterwards. Water getting trapped under the surface during pouring or before sealing leads to weak spots, blemishes, and poor sealant adhesion.
Skip installation during Perth’s prolonged wet spells. You need a solid forecast window covering the pour through to first sealing, which happens about one week later.
This dry period lets the limestone cure evenly and helps the sealant bond properly. Get it right and you’ll have that water-resistant barrier you’re paying for.
Pool areas and pathways cop regular splashing and heavy rainfall, so they’ll need annual resealing. This yearly refresh keeps the non-porous qualities intact and stops moisture creeping in to cause stains, algae, and mould.
Plan ahead for future resealing access and seasonal timing. Each reseal needs dry conditions for proper adhesion, so don’t get caught out by surprise weather changes.
Proper timing for both initial installation and ongoing maintenance keeps your surface performing through Perth’s wetter months and looking exactly as it should for years.
Site Preparation and Thickness: Getting Set for the Right Window
Getting your site ready properly is absolutely critical before any liquid limestone goes down. Your base needs to be spotless and structurally sound.
Clear away all debris and check every inch for cracks or loose material. Even small flaws you miss can trap moisture, creating dark patches, surface defects, or deterioration later on.
Sort these issues out beforehand and you’ll prevent future headaches whilst ensuring a durable, even finish.
Thickness planning depends entirely on what you’re using the space for. Driveways need a minimum of 100mm to handle vehicle weight and daily use reliably.
For overlays on existing concrete that’s crack-free, 40 to 50mm usually does the job, provided your original slab is stable. Go thinner on weak bases and you’re asking for premature failure.
The beauty of liquid limestone is how it adapts to curves, borders, and custom shapes that work so well in modern gardens and pool areas. You get seamless pours that follow your design perfectly.
However, chronically shaded or damp sections are trouble.Avoid them completely or improve drainage before installation.
Installing on poor conditions or compromised bases leads to water retention, long-term staining, and reduced surface life. Get your ground prep and thickness right and you’ll see the best results regardless of your layout.
Maintenance Cadence and Its Impact on Timing
Looking after liquid limestone is refreshingly simple. Regular sweeping keeps debris at bay and preserves that crisp surface appearance.
A quick hose down or gentle pressure wash handles dust, grime, and organic build-up without any drama. Deal with spills promptly to avoid stubborn stains, especially on unsealed or neglected areas that soak up liquids like a sponge.
Resealing keeps your limestone non-porous and resistant to moisture and marking. For most outdoor areas, plan on resealing every few years as a general rule.
High-moisture spots like pool surrounds or splash zones need annual attention to maintain protection and stop mould or algae hold.
Getting that first reseal timing right becomes much easier when your original installation avoids wet conditions. Schedule the initial pour and sealing outside of consistently damp periods and you’ll establish a reliable maintenance routine.
This prevents early surface damage and keeps your resealing schedule on track, ensuring long-term durability with minimal fuss.
Budgeting and Contractor Scheduling Around Weather
Supply and installation costs start at around £65 per square metre. This base rate can increase if your project requires premium sealants, tight access, sloped surfaces, or complex layouts, so factor these extras into your budget early.
Experienced installers are essential, especially when coordinating around Perth’s unpredictable weather. Professional liquid limestone installation in Perth requires skilled professionals who understand the correct order and timing of mixing, pouring, and sealing, allowing them to work efficiently within narrow weather windows.
This expertise minimises the risk of issues caused by moisture or delays.
Always secure a clear, written quote that details all inclusions and potential extras. Schedule installation for a period when dry conditions are likely to remain for both the pouring and curing phase, as well as the initial sealing step.
Booking dates during these dry windows improves results, reduces the risk of weather delays, and helps ensure the finished surface cures evenly and performs as intended.
Decision Checklist for Choosing Your Installation Window in Perth
Check the weather forecast for several consecutive dry days before booking your installation. You’ll need at least 24 hours after pouring without rain or foot traffic for the limestone to set properly.
The first sealant coat goes on about a week later, so plan for continued dry conditions during this entire period. This timing ensures proper curing and sealing performance.
Inspect your base thoroughly before installation begins. Make sure it’s completely free from cracks and drains well, as water pooling beneath or around the site will compromise your final result.
Never install over persistently damp or heavily shaded areas unless you’ve improved drainage first. These spots hold moisture longer and create ongoing problems.
Choose the right thickness for your intended use. Driveways need greater depth to handle vehicle weight and daily use, while overlays on existing crack-free concrete can be thinner.
For pool surrounds or other wet areas, arrange for non-slip sealant as part of the installation process. Safety and functionality go hand in hand.
Plan ahead for future maintenance, especially around pools and high-moisture zones. These areas typically need annual resealing to maintain protection.
Make sure your installation design allows easy access for future maintenance work. Getting trapped in awkward corners makes resealing a nightmare.
Finally, work with an experienced installer who can efficiently mix, pour, and seal within your chosen dry weather window. Proper scheduling is absolutely critical for achieving a lasting, low-maintenance finish.